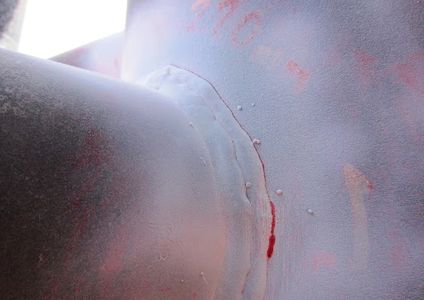
Welding
1/7
Welding is an important step towards final assembly of components. We specialize in metal inert gas (MIG), tungsten inert gas (TIG), and arc welding on a variety of metals and alloys including aluminum, stainless steel, mild steel, inconel etc.
Our team of certified welders ensures that the parts are welded using the correct electrodes and exceed the test criteria specified by the customer. We have welded a variety of materials such as SS304, SS316, mild steel, Inconel etc.
The products that we manufacture involve joining material of varying thickness and profiles. Some examples of combinations include (but not limited to): sheet metal parts to tubes, rods to tubes, tubes of varying thickness.

Tungsten Insert Gas (TIG) welding / Gas Tungsten Arc Welding
GTAW / TIG Welding is a manual welding process that is extremely precise, especially useful for welding thin materials.
Benefits of TIG Welding
* Superior quality welds
* Welds can be made with or without filler metal
* Precise control of welding variables (heat)
* Free of spatter
* Low distortion

Gas Metal Arc Welding (GMAW) / Metal Inert Gas (MIG)
In GMAW / MIG welding, an electric arc forms between a consumable MIG wire electrode and the workpiece metal(s), which heats the workpiece metal(s), causing them to fuse (melt and join).
Welding Inspection
All welded products are evaluated for quality of weld joint. Depending on the type of weld joint, and the product application, we use one or several of the following techniques:

Visual Inspection
Visual Inspection is the most important Non-destructive technique (NDT) that should not be overlooked. Visual Inspection involves both direct and indirect methods. In visual inspection, weld joints are inspected directly by an operator without any visual aids. In indirect inspection, the operator uses magnifying glass, mirror, borescope, or any suitable technique.

Dye Penetrant (DP) Test
DP test involves applying a liquid dye to the surface of a material and leaving the dye to "dwell" for a predetermined period of time. Due to capillary action, the dye enters into crevices. The dye on the surface can then be cleaned. By applying a developer chemical, the dye will highlight the regions where porosity exists.

Ultrasonic Testing (UT)
In UT, a transducer emits high frequency sound pulses, which travel through the material. When they reach an interface, they are reflected through the probe to the detector. Based on the results, a trained operator can interpret internal structure of material, depth and size of flaw. One of the most useful characteristics of ultrasonic testing is its ability to determine the exact position of a discontinuity in a weld.

Radiography testing
RT uses X-rays produced by a radioactive isotope to determine the presence of cracks, porosities, or presence of slag. X-rays passes through the weld joint / material and are exposed onto a photographic film, which results in an image of the internal structure. Denser material results in lighter image on the developed film, and vice versa. Presence of slag (which has lower density), cracks, or porosity, appears as a darker region because X-rays can pass through them and expose the film. By examining the developed film, the operator can identify the type and location of the defect in weld joint.